Use physical drives on Linux VirtualBox 7
Sometimes, you might want to use a physical disk on a VM.
In this article, we will go through all steps necessary to mount a physical drive into your VirtualBox VM on Linux.
First, once you have plugged your USB drive (or connected the drive to a SATA port), open a terminal:
sudo lshw -class disk
You will get a result like this: (The data you have to look for are highlighted in red)
sudo password for user:
  *-disk:0
       description: SCSI Disk
       product: 2.0 Reader    -0
       vendor: Generic
       physical id: 0.0.0
       bus info: scsi@6:0.0.0
       logical name: /dev/sdc
       version: 1.00
       capabilities: removable
       configuration: logicalsectorsize=512 sectorsize=512
     *-medium
          physical id: 0
          logical name: /dev/sdc
  *-disk:1
       description: ATA Disk
       product: CT480BX500SSD1
       physical id: 0.0.0
       bus info: scsi@3:0.0.0
       logical name: /dev/sdb
       version: 054
       serial: 2203E5FE03CE
       size: 447GiB (480GB)
       capabilities: gpt-1.00 partitioned partitioned:gpt
       configuration: ansiversion=5 guid=44c2d0dc-751c-4a8f-88df-c615bea9199c logicalsectorsize=512 sectorsize=512
Look for the logical name, in our example, it's /dev/sdb.
Then set the name of your drive and logical name in the command below.
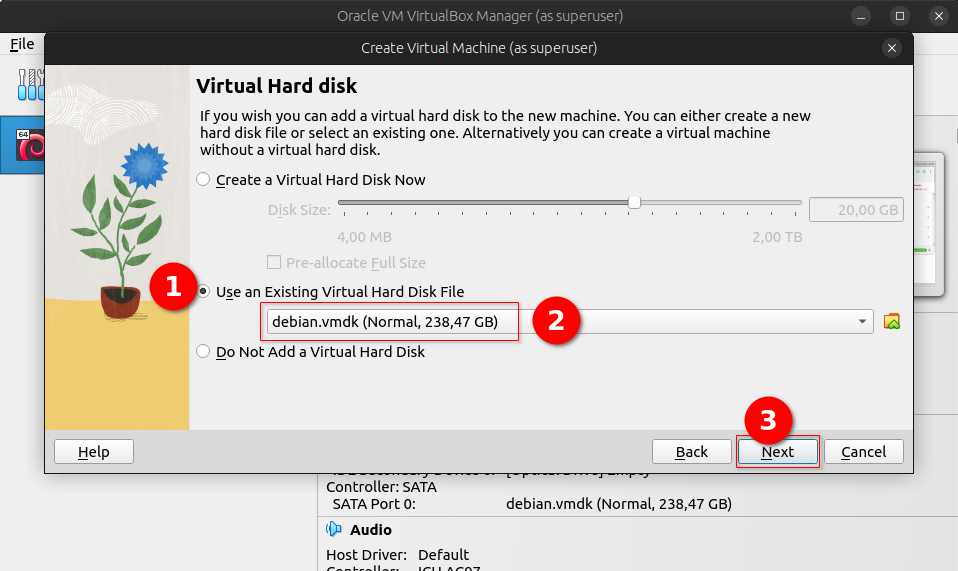
sudo VBoxManage createmedium disk --filename debian.vmdk --format=VMDK \
--variant RawDisk --property RawDrive=/dev/sdb
This will create a file debian.vmdk pointing to your physical drive.
Now start VirtualBox as root otherwise virtualbox will not be able to access the HDD, and create a new VM, then use this file as HDD.
That's it you can now boot the os which is on your physical drive right into your VM, or install a new OS on it to prepare a brand new PC that you don't have yet :-)